A Net In Time Schooling
Follow me on Social Media
  • Home
  • A Net In Time Blog
  • Homeschooling Organizations
  • Canadian Content
  • On-line Art Instruction
  • Bible
  • Books
  • Links
    • Puzzle and Page Makers
    • Christian Studies
  • Curriculum sources
  • A Net In Time Store

Fostering Independent Learning With Apologia, a Review

9/5/2016

 
For the past few weeks my son and I have been studying astronomy with Exploring Creation with Astronomy, 2nd Edition sent to us by Apologia Educational Ministries.  My son and I started doing this wonderful science program, meant for students in K-6 together, but gradually my son is starting to work independently.
Picture
Picture
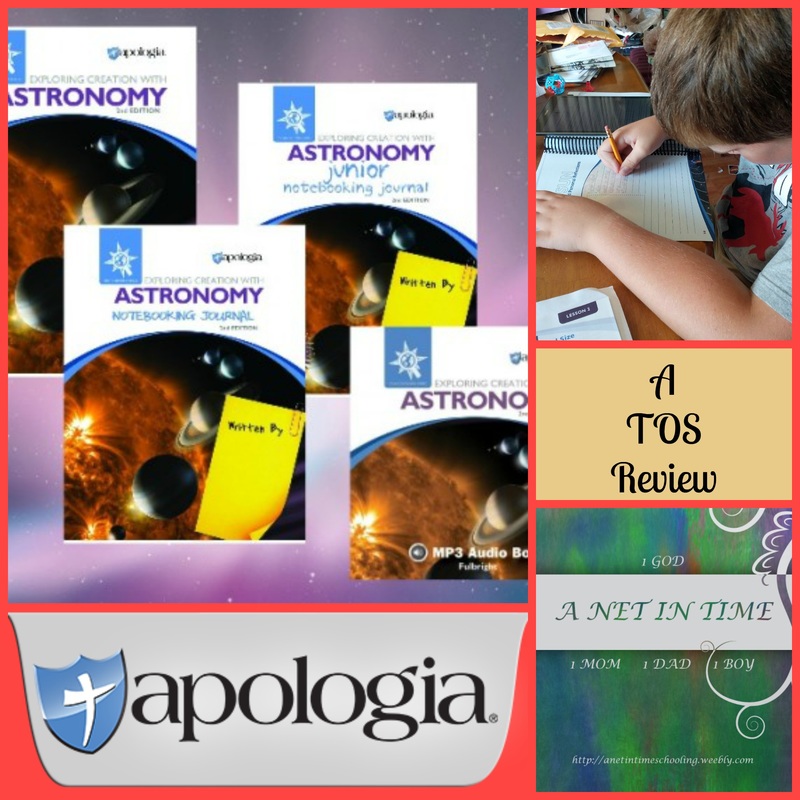
Apologia was gracious enough to send me a complete set of the Exploring Creation with Astronomy, 2nd Edition.   That set includes:
  • Student Text
  • Notebooking Journal
  • Jr. Notebooking Journal
  • Audio CD

Picture
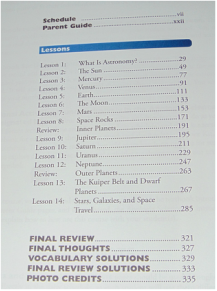
Let me walk you through my lad's and I approach to Apologia. 
First we checked out the table of contents.   We noted there was 14 lessons, which meant we didn't have to be in a hurry to finish the course, we could easily be done in 14 weeks, or longer if we got distracted by life.  :)

I talked with him about how eventually I thought he could work through a lesson all on his own and about how we were going to work towards that.

Lesson One and Two we would do completely together, lesson one doing all the elements called for so he could make an informed decision about what he REALLY needed to accomplish.
We then noted how each lesson (and chapter) follows each other closely.

Each lesson is broken into four daily assignments, "MOM, that means I can decide to do two one day and then I have a day free right?"   What can you say, but sure lad?  :)

Readings and activities and a "what do you remember section".  
Picture
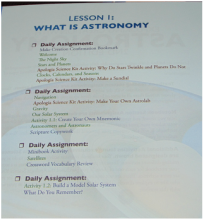
So we worked through lesson one, noting how closely the workbook follows the textbook.   We saw the full colour pictures, and noted how clearly then set out the activities in the textbook. 
Picture
We noted the lapbook elements, which admittedly aren't my son's highlight, but he asked if he could write the information without having to make them.  And I agree, the point was to remember the information, they were just trying to make it a more interesting way of doing it.    He did make the odd element thought.
Picture
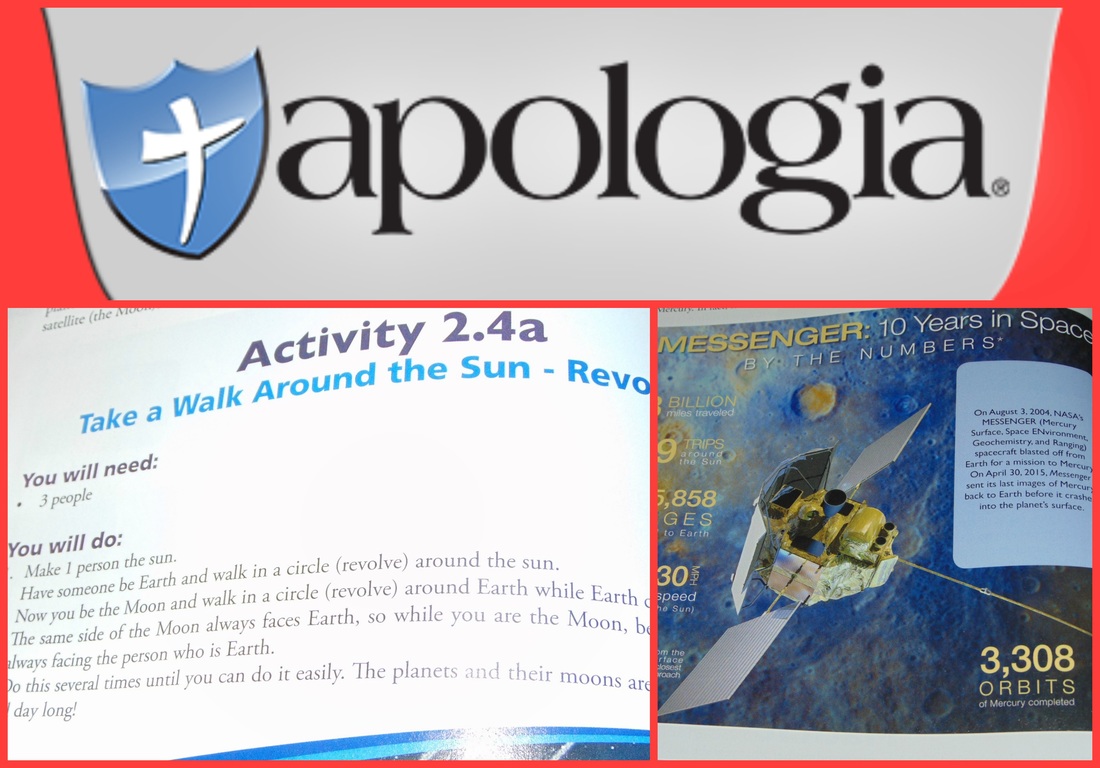
I do need to tell you about the giggles and conversations we've had.   One of the activities called for us to have three people minimum and since we didn't have the third person we decided the cat Milo could be the sun.   Boy oh boy, talk about a confused cat.  :)   He kept turning his head and looking at us, especially since each time the earth revolved around the sun the cat got a pet.   But add in the earth also rotating as it revolved and oh my...the giggles that ensued.  

It made for fun times and good conversations, like why doesn't the earth get dizzy, what do you think keeps the earth from getting all wobbly?   All these questions keep a boy coming back for more you know?
Picture
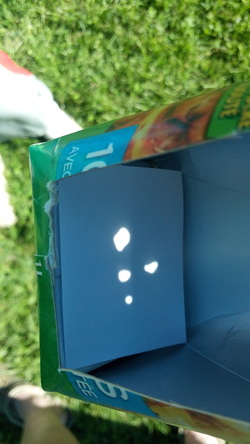
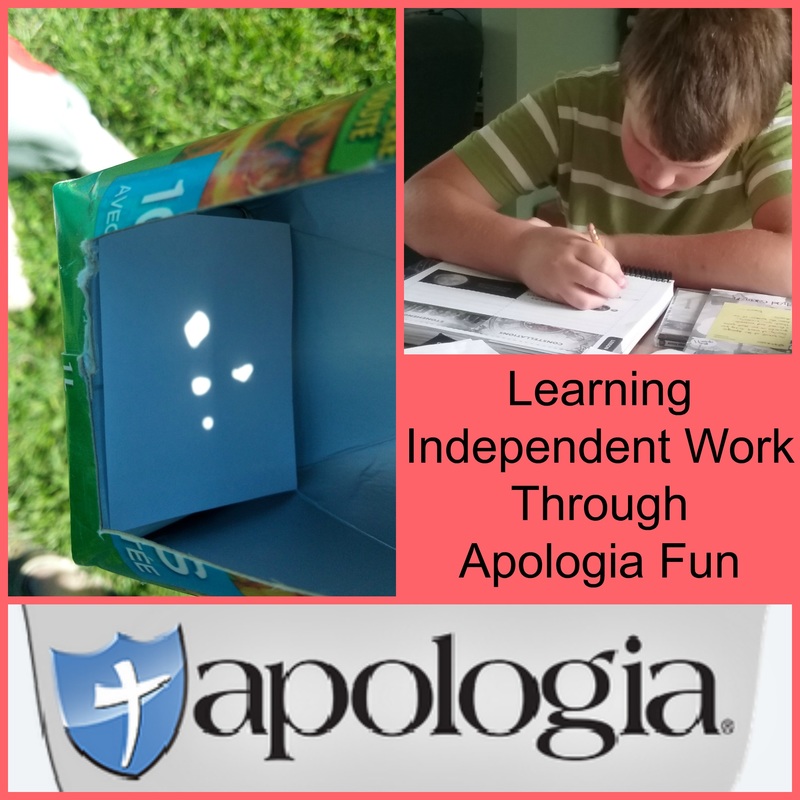
In Lesson two my lad decided not to do the lapbook element (as in making it, but he did write out the required knowledge).  He started to get a good idea about how the lesson would progress, and he chose to combine two steps into one.   We made a pinhole camera so we could clearly see the sun, and one of the questions asked was, what happens if you make the hole bigger or smaller?  it called for using different pieces of tinfoil which my lad thought was wasteful.   So he made a modification.

It was rather funny though, one of the books my son really likes is the Warrior Cat series and at one point there was an eclipse which scared all the cats.   So as my lad was playing around with this pinhole viewer, he added an element where the sun was blocked....It was funny.  How did you feel mom, where you like the cats and all scared when you couldn't see the sun   Huh mom????   :)

Picture
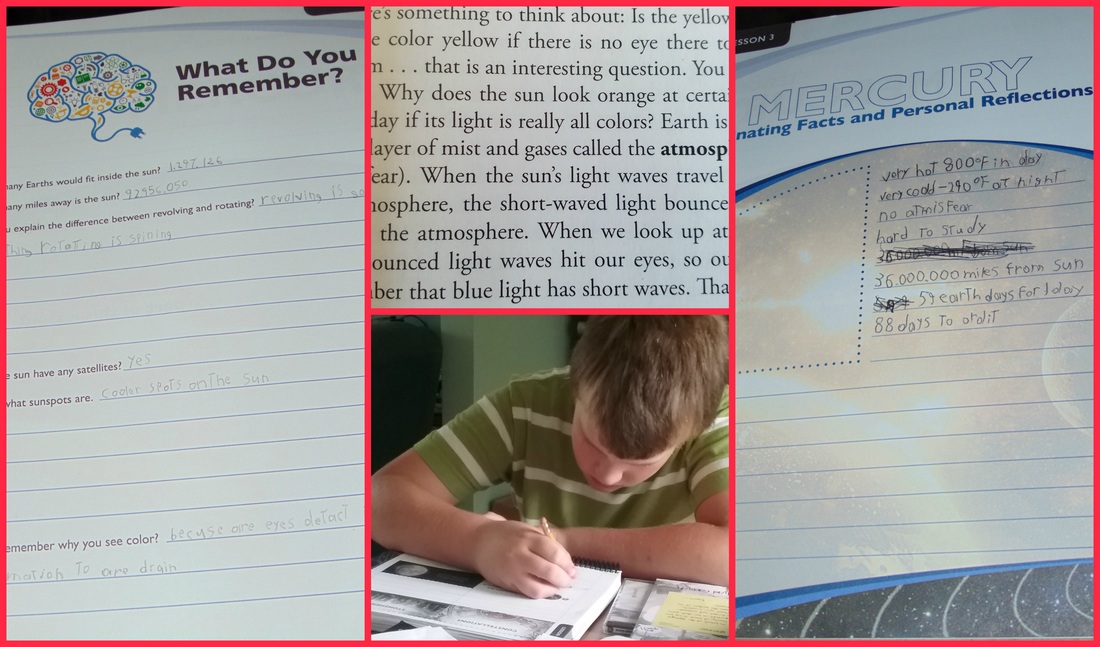
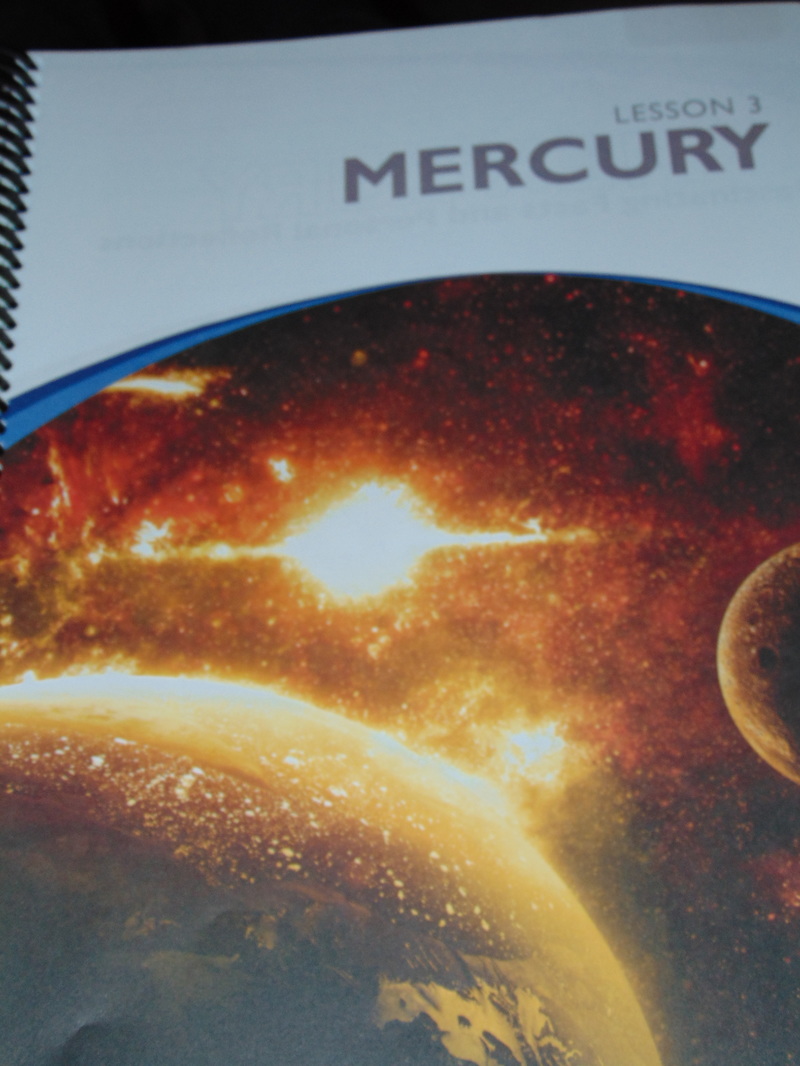
By Lesson Three my lad was confident enough in his abilities to work through one section while at gramma's, and then did the "do you remember" part independently.   I have to admit, we aren't going through the book quickly.  We are averaging 3/4's of a lesson a week since it's technically still summer holidays here.  We'll be starting Lesson Four this coming Tuesday, my lad has already determine that he'll do the first part at gramma's on Tuesday and then two parts on Thursday and one on Friday.
Part of his planning is a request that I do some of the reading while he works on his copywork.   The copywork is provided in print and cursive.  My son prefers to work off the print, but writes it in cursive.

I need to mention the junior notebooking option, we looked through it and my son chose to do this book even though it has more writing.   The junior workbook for this science curriculum for homeschools, has less writing, shorter copywork and pictures to colour.   It's a simpler version for younger children.
Picture
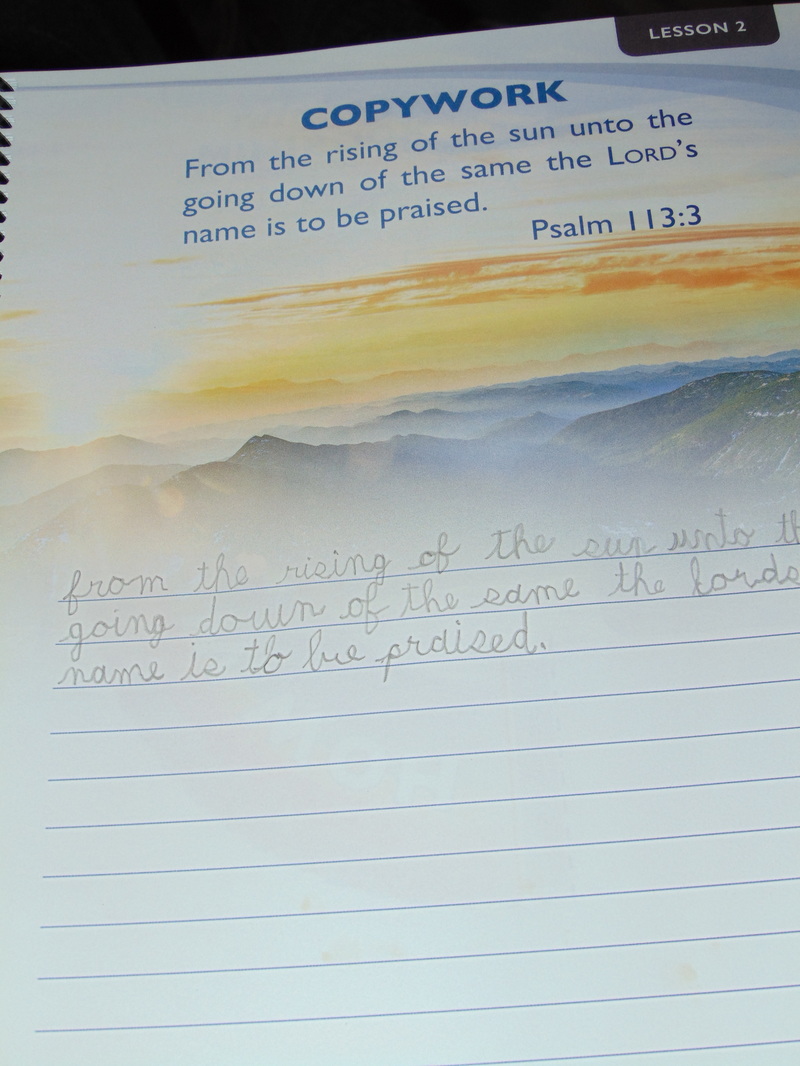
The clear concise text, the ample room to write and questions that followed the text, all help my lad in his quest for more independence in his work.  
Picture
I suspect, that by the time we are at lesson seven my lad will be taking more control of how he works through this science curriculum.  Exploring Creation with Astronomy, 2nd Edition has proven to be a timely addition to our homeschooling this year and we will be finishing this book.  It'll be our science go to.  :)   It's working well to teach my lad that he can work independently.  He's thought about using the MP3 cd for the reading portion, but at this point doesn't see the need to do so.   It's great to have it, for days you don't feel like reading, or if you have a less than confident reader.
Picture
Picture
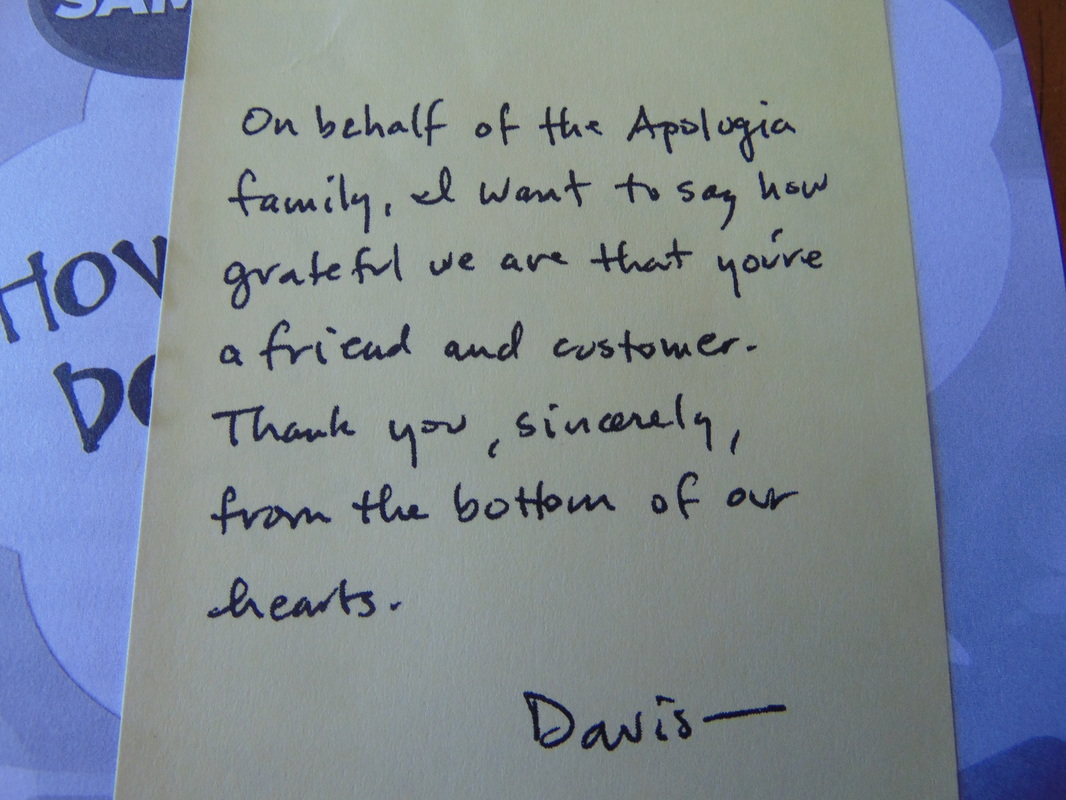
I have to admit, when I opened up my package and saw this note included, it made me think...wow... what lovely people. I bet they have great customer service. Isn't it nice to get notes like this with your orders?
Various members of the crew have been working diligently with Exploring Creation with Astronomy, 2nd Edition by Apologia Educational Ministries.    There is also an additional science kit you can purchase to go along with this course.  It is not mandatory, it is just an exciting optional purchase to help complete experiments both in the book and in addition to it.  You can find that kit here.  To read what other TOS reviewers have to say, click the image below.
Picture
Social Media Links:
Facebook: https://facebook.com/apologiaworld
Twitter: https://www.twitter.com/apologiaworld @apologiaworld
Pinterest  https://www.pinterest.com/apologia/
Instagram:  https://www.instagram.com/apologiaworld/

Hashtags: #hsreviews #apologia #astronomy #homeschoolscience
Picture

Kim's White Bread Recipe, Altered

9/4/2016

 
Tried another bread recipe, this one from Kim.   Hubby asked "can you make some of that into buns?"  So 1/3 of it I turned into buns.
Picture
Ingredients as called for in the recipe:

3 cups warm water
4.5 tsp yeast OR 2 pkgs
5 tbsp sugar or honey  (if you heat the honey til liquidy it mixes in really really easy)

1 cup milk (optional to replace with water if not using milk)
5 tbs butter (about 1/4 cup)

1 tsp salt
2 or 3 eggs

about 7 cups flour

Directions:
1. mix water, honey/sugar and yeast together, let set while you warm the milk and butter. 
2. Add warm milk and butter to water and yeast mixture.
3. add salt and eggs.
4. Add flour one cup at a time.  It will take up to 7 cups of flour.   You will know it's well mixed when it pulls away from the bowl.
5. Turn out the dough onto a floured surface, flour up your hands and knead for 10 minutes.
6. Place the dough into a greased bowl and let set until risen -- will double in size.  Takes about 40-60 minutes.
7. Preheat oven to 350
8. Punch the dough down, divide into three and make your loaves or buns.  Cover with damp cloth and let sit until risen (about 20 minutes)
9. Bake at 350 for 30 minutes, unless making buns then cook about 20 minutes.
Picture
Once again, I made some changes, some deliberate, some well.. OOPS!
Changes Made:
1. I again used two types of yeast because I failed to get out shopping yesterday.
2. I forgot the salt and the eggs... GO FIGURE, it worked anyways!!!!   The butter I am using right now is salted so I think that helped.
3. I added an extra almost tbsp of honey because I slightly over measured the hard honey we have here.   Didn't want to pour it back into the container as it just seemed like too small an amount to fuss with.  :)
4. I didn't use the stove top to heat the milk and butter, I used a microwave (easier).   Just heated it for 30 seconds at a time until it was warm and the butter melted.
5. all told, from when I was kneading the dough I probably used 8 cups flour.
6. Rising time varies depending on the temperature in the house, might take longer to rise (see image above from buns allowed to rise different lengths of time, the smaller one for 20 minutes, the larger for 50.

Bread... Traditional White Bread.  I MADE SOME!!!!   :)

9/1/2016

 
So, as you know, while I was camping I learned to make bread.  :)   It was fun.  I don't tend to make bread at home as it's just SO easy to buy it right?   We buy it on sale so it's cheap too.   But the success  I had while camping made me think, ha!  I can do this at home.   REAL bread not just soda bread as an experiment with my lad.  :)

And CHECK IT OUT!!   It worked.  (thanks to the moral support that Kim offered me).  :)
Picture
This recipe came from here.Ingredients2 h 30 m 20 servings 187 cals
  • 2 (.25 ounce) packages active dry yeast   I used two kinds of yeast as that's what I had and you know what?   It worked!
  • 3 tablespoons white sugar
  • 2 1/2 cups warm water (110 degrees F/45 degrees C)
  • 3 tablespoons lard, softened   I used veggie oil
  • 1 tablespoon salt
  • 6 1/2 cups bread flour

Picture
The bread is a rising!

Directions:
  1. In a large bowl, dissolve yeast and sugar in warm water. Stir in lard, salt and two cups of the flour. Stir in the remaining flour, 1/2 cup at a time, beating well after each addition. When the dough has pulled together, turn it out onto a lightly floured surface and knead until smooth and elastic, about 8 minutes.
  2. Lightly oil a large bowl, place the dough in the bowl and turn to coat with oil. Cover with a damp cloth and let rise in a warm place until doubled in volume, about 1 hour.
  3. Deflate the dough and turn it out onto a lightly floured surface. Divide the dough into two equal pieces and form into loaves. Place the loaves into two lightly greased 9x5 inch loaf pans. Cover the loaves with a damp cloth and let rise until doubled in volume, about 40 minutes.
  4. Preheat oven to 375
  5. Bake at 375 degrees F (190 degrees C) for about 30 minutes or until the top is golden brown and the bottom of the loaf sounds hollow when tapped.
I have to admit, I used my thats-a-bowl from Tupperware, the lid pops when the bread has risen enough) - learned that from someone in casual conversation..  
I also used the sun's energy to help the bread rise (said put in warm place and the house felt coolish to me).
I used more flour than the recipe called for but Kim assured me that's perfectly normal.
Also instead of oiling my bowl I used my "Pam" to spray the bowl and just rolled the bread dough around in that.
Took precisely 30 minutes to cook.   Eating commenced shortly thereafter.

Things learned... don't freak out if you use too much flour.  Don't stress over the type of yeast used, it will still work out.  
It's FUN to punch air out of dough.   Watching all those air bubbles squish out was cathartic.  :)
Use a knife to loosen a stuck loaf from the pan, you won't hurt it and helps it come out of the pan nicely.

Picture
Next time I think I will make Kim's white bread recipe.

Kiwi Crates Were a Hit on Vacation

9/1/2016

 
affiliate links are in this post, it does not affect you, it just hopefully provides a way for me to help my son get more crates to create!
I don't know about you when you go on vacation, but I always find myself packing along things to keep my lad busy on rainy days, before supper is made, or when it feels just TOO HOT to do anything else.  :)   When we went up to Grundy Lake for our annual camping trip, I did what I always do but this time instead of raiding the local Dollarama for some art supplies, I brought along some Kiwi Crates.
Picture
I have to admit, we've been enjoying these crates for a while now.   You can get a variety of length of subscriptions.  From month by month, three, six or twelve month subscriptions.  Kiwi Crates is also associated with tinker, doodle, koala and cricket crates.   A big part of me wishes I had met these crates AGES ago.  :)
Picture
My lad ALMOST gave up with this challenge, he was SO frustrated by it but in the end, he got it to work.   My finicky careful lad almost got out finickied.  :)   BUT did he learn a few things?  For sure.
1. Patience wins out
2. it's actually really neat if you get it all to balance just so
3. magnets are pretty tricky to work with if you want them to work against each other.
Picture
Follow the instructions to put it together, tell mom SHE's WRONG (and be right) and have a ton of fun.  Then put everything in a different spot and try it another way.   My lad had SO much fun making this pinball machine and then playing with it.  It continues to be a favourite item to play with.
Picture
 OH boy oh boy.. this was the BEST kiwi crate EVER in your entire life!!!!!     My son was so intrigued by this crate.   The combination creation proved to a hard one to come up with until he decided to draw every spider he's ever owned plus a few extras just to mess with people.  He would not let me take a picture of the actual combination and posed his lock very carefully so as not to give it all away.   The Combination Lock was a totally awesome hit in my son's eyes.  :)

Next week we'll be making another one... my lad is curious about it.  Fun times ahead!  :)  Check out the video below to show persistence does pay off...
What else do we link about Kiwi Crates?

Clear concise directions, a booklet that gives you additional information and asks questions to help you figure out more ideas to think about.  :)

All the supplies you need are provided.   In the floating pencil we didn't even need to provide the pencil!   My son loved the tiny crayons that were included, "Look mom!  They are neat, see how they all fit together?"   All the tiny pieces for the pinball were neatly bagged.   The combination lock thankfully came with an extra wood circle as well.
Picture
All in all, I am glad that we took the time on our vacation to do these kiwi crates.  It gave my lad something to do while waiting for supper to cook, and on one of our cooler days.  Looking forward to doing our next one and upgrading to the tinker crates.  :)

Python Dogs and Sun Bread

8/17/2016

 
Do you know what I learned when I went camping?
I learned to make bread!   YES!!!  Me....who rarely if ever makes bread.  I made bread!
Picture
First off you need to make a sun box.   The size of the box can vary as long as it can hold the rack that your bread pan will sit on and big enough for the coals.
Picture
i have to admit the instructions I found where none to clear and when I printed them off they were even more unclear with lots of misspellings and random characters (which if I had had time to check before leaving to camp I would have retried but I grabbed my bunch of recipes and instructions off the printer as I ran out the door).

Instructions:
One box.  make sure it will easily fit the rack you are using.
one roll of aluminum foil.   I used regular strength.
then either Sticky spray that will hold down the foil OR aluminun tape (comes in a roll like duct tape).

1. remove the top of the box. Either attach it to the bottom of the box OR to one of the long sides.  The picture wasn't clear and the instructions horrid.  I did it to the side of the box.  And truth be told I didn't attach it, just laid it on top.   It fit nicely.   The box I used was the chips box.

2. Cover the box COMPLETELY will aluminum foil.  Use tape/spray liberally. You want it completely covered.  No box showing as that would be a FIRE HAZARD!  Shiney side facing out NOT in.

3. Once that is done say YEAH!!!!   The hardest part is finished.

Now some hints.
If you put the extra layer on the bottom the sun will help provide heat (if it's a sunny day) to cook the top of the bread.   Doing this will give you a loaf with a very light shading of brown.
OUR site was a shady one...one small patch of sun that moved and then disappeared so I did mine on the side so the heat of the coals would radiate off the top of the box and cook the bread that way.
Picture
Make your dough.  We used three recipes total in our bread making ventures.

First two loaves I made was Irish Soda bread.  VERY easy to do.

Ingredients and Instructions

4 cups flour (I used a fibre flour so needed a touch more liquid for the first loaf, regular flour for the second loaf)
1 tbsp sugar
1 tsp baking soda
1 tsp salt
2 cups buttermilk

Mix it all together (first the dry then add the liquid).

Form into loaf (I used disposal pie plates) OIL THEM FIRST!

Cut a cross into the top, it's traditional and it allows the bread to expand.

Let it sit the ten minutes it takes to get your coals hot in the chimney.  You'll need about 14 of them.

Takes about half hour to cook.  If a coolish day you might want to add a sleeve of aluminum foil to the top of the box and drape it down to contain the heat.

This bread stores well wrapped in tea towels.
Picture
Third and fourth loaf was a yeast recipe bread.  Also very easy to do.

3 1/4 cup flour
1 pkt dry active yeast
1 tsp salt (I used kosher)
1 1/2 warm water.

First time I let the yeast sit in the water for five minutes and then added the remaining ingredients (mixed together first).
Second time I just mixed everything together without letting it sit first.  

JUST SO YOU KNOW you get a lighter loaf if you let the yeast sit for a bit first.  :)

So you have it mixed, now let it sit in a warm spot for an hour (we used the vehicle as it naturally gets warm in the sun).   Punch it down and then shape it by tucking it in (form a circular shape and pull the dough from the center tucking it under neath).

First time we followed the instructions, preheating a dutch oven and cooking it take way.  Just so you know... NOT A GOOD METHOD!!!!   A preheated dutch oven is VERY difficult to work with!!!

Next time I just cooked it in the sun oven and it turned out great though I got distracted the last five minutes so it got a touch darker than it should have.   Still tasted good.

Fresh bread lasts two days when camping before it moulds so eat it quickly.

This bread does best stored in a bag, large ziplocs work well for this.
Picture
The last recipe I made was really versatile.
It is I THINK supposed to be for making tortillas or wraps or something like that but we played around with it.

INGREDIENTS
4 cups flour
2 tbsp baking powder
1 tsp salt
1 tbsp melted butter (we used oil)
2 cups milk (used almond milk as it travels and stores well)

1 cup flour (or thereabouts)

cooking oil

Mix first five ingredients together (first dry and then adding wet).

Flour your working area with the remaining flour...not all the flour at once, just a bit at a time so you can work with the dough.   The flour helps you flatten and shape it.

Now you have a choice to make.
Make it super thin and cook on a slightly oiled fry pan like a tortilla.
OR make thin strips and wrap around a hot dog, chocolate bar, or other such items and drop into a hot oil pan.
OR make into thin wedges and turn them into crispy chips cooked in the hot oil
OR make them into thicker pieces like indian fry bread (great with honey, jam) or if you slice into them like pitas into peanut butter-jam sandwiches.

PLAY around with it.  Lots of fun.  My son said they were great wrapped around starburst candies.

NOTE: when wrapping them around something... you want to use less flour so it's kinda sticky so you can mould all the pieces together.
Picture
Picture
As you can see, it was a bit of a learning curve.  We called the wrapped hotdogs PYTHON dogs.  My son likes snakes, and pythons can swallow things whole, and they wrap around their prey.  :)

This bread stores REALLY REALLY well and became our go-to for our final days of camping.
Picture
I STRONGLY advise caution while working with hot coals and a sun oven. 
Mind where you sit and what you are working on, lest you have a fall and have hot coals hand where they aught not land.  You don't want to deal with a burn while camping.  :)

Vacation Time Travelling Books

7/29/2016

 
Did you know that pretty soon I'll be heading off for a vacation?  Yes!   It's that time of year again and I'm looking forward to getting away.  :)   We are heading up to Grundy Lake which the boys really love going to.   Fishing, kayaking, swimming, trails to walk and more. 

BUT.... it's a four and a half hour drive!   I'll have two boys to keep busy, and I am sure that when YOU go on vacation you will have children that need something to do as well. We can play the alphabet game, the cow game and how many _____ can you find type of games.   BUT it's good to have quieter things they can do as well.  Enter therein a couple of vacation help books.
Picture
Picture
I don't know if you are going to take a trip to Toronto, but if you do and you want your children to know something about Ontario's Capital, this book Totally Toronto will definitely get the ball rolling.  It is filled with all sorts of activities to engage your children, Dot to dot, fill in the blank, word find, decoding secret messages and more.

It's a nice sized book (8.5 by 11) with all images well away from the edges of the page, making it ideal to work on wherever you are.  62 pages of fun for your children.  I would say its geared to 6-10 year olds.

Picture
Picture
Now here's a book for the monster lovers among you... or the wanna be monster lovers.  :)   Tattoo Time: Monster Activities.

It starts off with tattoo, 2 pages each of two sets of designs.  None of them are scary monsters, they actually look pretty friendly.  :)

This is followed by 32 pages of monster activities.   From colouring to drawing pictures to seek and find and more.    A fun little book about 9 x 5 inches.   Easy to take along as it lies flat with pages that would come out easily if needed.   This book is good for younger children.

Picture
So what kind of books have you found to help your children while away the hours on the road?    Do you let them get lost in their tablets or delve into the lives of people in their reading books, or do you also provide activity books?  
Picture

Review: Make Your Own Spaceship

7/28/2016

 
A boy's birthday party, children needing something to do ... what can you do?   I know!   Give them a kit to make model spacecraft!   From ages 5 to 12 they are sure to be a hit!  So, let me tell you all about it.
Picture
I received a solid well made box filled with cards with space craft to make.  They came with no instructions about how to make them, and at first I thought this would be a problem until I listened to the children,
"No, put that here",
"I think it goes over there"
"Hey let's check the box maybe we'll find the picture"
"Yeah, I got it!!"

12 fully illustrated spaceships that punched out well and fit together easily.  See the smiles below?
Picture
I have to tell you, I did not anticipate one small spot of trouble...too many of the children wanted to make the "make it your own" ones... Tears and recriminations almost resulted until I intervened with "who is the birthday boy?   Does HE want to make them?"

Who would have thunk that the plain jane colour it yourself versions would have been so downright popular?!?!?!?!   Not what I anticipated.

A couple of alien figures were included as well... I think one mysteriously made it's way to an unknown residence.
Picture
As the children worked through spaceships, I thought what an excellent addition they would be to a transportation study, or a unit on outer space or aeronautics.   The children, when they finished the spaceships, then took then out and starting throwing them through the air, testing out their aerodynamics... some of them surprisingly flew really well!   I had a video but well.. it's gone into the nether.  :(
Picture
But what it really came down to in the end was... a bunch of children having fun laughing, creating, talking and building at a birthday party, and life was good.  :)

I do have to tell you that: I received this kit from Raincoast Books for free.   It's called "Make your own spaceship".   It was put together by Laurence King.

If you want to buy it for your own birthday party or a study unit, check out my affiliate link as follows.   Doesn't cost you a dime and helps me make ends meet. :)

Review: ArtAchieve

7/11/2016

 
Imagine this... You have a child who is good at art, but is reaching that stage where he wants to try new things, but has a mother who isn't quite up different ways to do art and doesn't have the inspiration for it either?   Enter in The Entire Level I course of ArtAchieve... it has been a blessing to a lad and his mother.  :)
Picture
ArtAchieve: What is it?
  • Inspired by art from all around the world
  • help people like me teach art to my lad
  • includes helpful links to make the art lesson broader, covering social studies, science and language arts
  • it is an online art drawing program from children from kindergarten age up through to adults of any age.
  • Lessons are presented in video and power-presentation formats
Picture
What is included in the Entire Level I course?
  • Shading Rounded Objects (this is also a free lesson)
  • The hungarian Insects
  • The Haitian Gecko
  • The dragonfly from Ecuador
  • The Chinese Dragon
  • The Owl from Bali
  • The Kitenge Tree Wall Hanging from Tanzania
  • The Plate from Nepal
  • Four Suns with Four Faces
  • The Sheep from Wales
Each Lesson has four sections to it.
Picture
   I really appreciated the layout of this on-line art curriculum, I loved that we could go as fast or as slowly as we wanted to.

We started out each lesson watching the video lesson.  This gave us an opportunity to just see what we were going to do and get the ideas into our heads.  We would talk about the new techniques we would be learning and make sure we had the needed supplies.

We'd research the topic of the lesson... geckos, suns in art, and dragonflies.   Seeing how people have used them in art and observing them in the wild (via video in the case of geckos).   We did science (studying geckos and dragonflies), Geography (learning about where the art inspiration came from, seeing where that was in the world), art (seeing how the sun has been used in various art forms) and more.  Art, interwoven into so many subject areas.  I can totally see this being used in a co-op situation if you have a screen big enough for all the children to view.

We worked out way slowly through each of the lessons using the power point presentation.   We really liked how we could go slide by slide, skip ahead, go back and double check what we are doing.   Using out touch screen laptop was very beneficial in this, helping us flip through the slides quickly.

And to be honest, I have to admit that I really liked that ability to slow down and go at our own pace, it fit into how we do school and life.  :)
Picture
Working on the four suns project was a great way to show my lad how two people can approach the same project with the same instructions and come out with a completely different project.  It taught him a bit about planning ahead, and when that doesn't pan out the way you thought it would, how to regroup and figure out how to make it work.   I LOVE the vibrancy in my son's four suns work (he didn't want me to show the finished work).  He is SO detail oriented... I think the final result turned out splendidly but all he sees is the bobble he made on the cool side...  In my eye the colours on his just pop out and say HEY, look at me!!
Picture
My four suns. Completed.
Picture
The lad's four suns, a work in progress. He is more exact in his work than his mom is.
Picture
I have to admit, that there were areas that my son struggled with. This provided us with an opportunity to talk to John and discover that he's a very helpful and friendly fellow.

Rules for drawing stymied my lad:
Silence?   Playing Music?   MOM!!!!
Some of you don't know me or my boy well enough to know that we are chatterers.   We like to talk about all sorts of things while working, and most often it's not connected with the task at hand.   So the idea of playing music or working in silence was an anathema to us.   So we asked John why this was a recommendation. 
His words: Maybe a story is a helpful way to answer this. When I learned to play tennis, I was constantly saying things like, “Oh, no!” and “Come on! That was terrible!” as I swatted at the ball. A friend advised me to hum while I played, and for me that humming ushered in a big step of progress in my playing. Why? Because while I hummed (while I was caught up in the tune) I wasn’t able to engage in all the negative talk. The negative talk got in the way of being playful, thinking visually/spatially, and being aware of how the game was going. The negative talk turned play into work, and made me a poor player. Humming made me more playful; it made the game almost like a dance. As the game became more fun and playful, my skills advanced rapidly.
       Playing music during art can work in a similar fashion, if we let it. It also helps us make that mind shift from verbal/analytical thought to spatial thought. If it helps to hum along with the music, do so. If you prefer to simply hum, like I did in tennis, skip playing music, and simply hum.

My son couldn't work his head around humming and doing art, so we gave up on that idea, and has been learning that silence sometimes helps with concentration, but we still chatter.. it's part of who we are.  :)   

Picture
As you go through the lessons, John makes them as helpful as he can.  Providing lists of supplies needed, practice sheets for drawing and basic instructions for what to do with your paint is too thin, not the right shade and such like.   Many different techniques are included into each art work, from learning the cool and warm colours, shading, blending and much more.

Picture
Our most recent project, the dragonflies, we haven't finished yet.   My son is not convinced that adding water colours to the oil pastels will work well, so he's been testing it out on "bad drawings".   What colours he wants to use, how much, in what patterns and will it affect his dragonfly?   He's worked hard on it and isn't convinced it "isn't perfect" but is starting to think it "might be okay".   It's hard sometimes when you are a perfectionist and you're engaged in a medium for the first time.   It's been a great project for him though, as he's seeing how science and art go hand in hand... from learning about the object we're drawing, to finding ways to draw circles in decreasing sizes, mixing colours, figuring out thickness of paint and water and how to combine the two, and through it all...needing to breathe out his frustration and relax.

The relaxation techniques that he hated when we started have become a part of doing art now.  As John told us "it’s a way of helping us be more aware. First, we take time to be aware of our breathing, and that aids in slowing us down; it sets us up for being aware and taking time to look carefully when we get into the drawing, to notice how a color is working, etc."
Picture
We received a years access to the entire lesson I art drawing lessons from ArtAchieve. 

I fully anticipate completing the rest of the art projects. 

Over the next three weeks I anticipate finishing another project with our International Student who is visiting us from France.

It will be a great way to practice English and to have fun learning.  He's quite curious about the fact that we school at home as he's never heard of such a thing before. 

Did you know that you can purchase individual lessons?  I know awesome eh?   You can also try out sample lessons from each of the levels.  

The site is easy to navigate, so I recommend you visit them and check out the individual lessons.   Each bundle of lessons is priced differently ($27 and up), as are the individual lessons ($4 each and up).   All available for a full year.

99 people from the TOS crew have been reviewing three of the different levels the ArtAchieve offers. 

Entire Level I
Entire Level II
Entire Level III

Click on the banner below to learn more

Picture
Social Media Links:
Facebook: https://www.facebook.com/Artachieve
Twitter: https://www.twitter.com/artchieve  @artachieve
Pinterest: https://www.pinterest.com/artachieve/
Google+: https://plus.google.com/+artachieve
Instagram: https://www.instagram.com/johnahofland/
Picture

Recipe: Sausage Stew

6/30/2016

 
I don't know that I'll ever be able to replicate this stew or not...but it turned out really well.. so well that even the lad liked it!!!!    I will tell you what I put in it (roughly speaking) and see what happens in the future.  :)

I will tell you that this was a family effort.   All three of us did chopping and peeling and cutting and mixing.    Family efforts make the food taste better.  :)
Picture
Into one large crock pot put in
  • 1 container of chicken bouillon (or use beef if you have it)
  • Turnip/rutabaga - 1 medium, peeled and chopped
  • White Potato - a few..chopped, peeled as they were old potatoes, don't need to if new ones.
  • Sweet potato - one regular sized one, peeled and chopped
  • Carrots - four I think
  • Onion - one big one
  • Sausage - couldn't tell you what kind, they came from the foodbank and were a touch freezer burned when I got them.  Cooked them, and froze them, pulled a small bag out... six I think???   and chopped them up.
  • Tomato... wanted four... ended up with 1.5 as the lad who was chopping them up said "MOM!!!  There are soft spots!!!!"   and he couldn't cope.  :)

Tossed in some thyme (the lad said it smelled good) and some oregano and basil. 
The lad put in a bunch of garlic salt and some black pepper.

Let it cook for a good spell in the crock pot.
Hubby said "hmm.. tad bit thin yet lovey, and it's missing something".
So.. took out two cups of broth and added two tbsp of cornstarch to that.  Mixed it up and then put back into the pot.  Tossed in a bit of no salt seasoning.   and let stew a bit longer...

I honestly thought hubby dear was going to finish the whole crock pot himself!   He went back for bowl after bowl..  okay... in retrospect.. I was REALLY not feeling well last night and it only appeared he was going to finish it off...hubby read this over to make sure I wasn't too incoherent (dealing with bad headache) and he said that he only had two extra bowlfuls.  :)

We had just enough stew left for us each to have one bowl for supper tonight.

Math Games with Sunya Publishing, A Review

5/24/2016

 
"What would you rather do son...play Sunya or do your multiplication pages?" asks an inquiring mom.    "Sunya, can we play Sunya mom?"  

Sunya Publishing sent me and my son their math game called Sunya - The Magic and Wonder of Math and Science Multiplying & Dividing, ages 9+, which my son and I have been enjoying for the past couple of weeks.   It's a game he takes along when he visits with Gramma who says "this is a fun game to play". 
Picture
Sunya Publishing is a company with a desire to help children learn their math facts in a fun, family oriented way.   Can you make math sentences using the cards in your hand?   Can you help your mom or your sister or brother if they are struggling to make a sentence?   Can you tell if someone has made a mistake?   Get rid of the cards in your hands first but don't forget to say Sunya!

Sunya® (the "u" pronounced as the "oo" in the word "book") is a word from Sanskrit, the ancient and classical language of India. Our modern number system was invented in India 1,500 years ago. This word means “empty or void of any quantity.”

Family fun and cooperation, with a friendly spirit of competition, while you practice your math facts, this sums up Sunya.
Picture
Isn't it a lovely purple colour?   The book that I received was filled with instructions about how to play Sunya.   I found it best to just kinda dive in.  Give each person four cards, make a starter sentence with either multiplication or division, and then see if you can make a new math sentence, taking away the lower cards as you go to add to your take from pile.  Help each other out.   Once you get used to playing, then reading through the rules to refine your playing methodology works really well.    :)

The book I received was mostly done in black and white, but it had a couple of colour pages (just so we could see which we preferred).  I have to admit, I thought that the black and white worked just fine, but it was a nice break to have to odd full-colour spread.  I can totally see them using the full-colour spread to introduce a new chapter in the book OR as the start to a new method of playing.   Just to make certain sections stand out a bit.
Picture
We received the Sunya book which teaches you all the rules and methods to play, a  number line, a set of number cards, and some riddle/quiz cards for fun.   I have to admit, when my lad first met the riddle cards he was unimpressed, thinking the cards were out to get him until he caught on!     Then, like many 10-11 year olds that I know that like to pull a good trick, he worked his best to catch me out... every time he won a round "MY TURN MOM!"   :)

One of the riddle/information cards talked about a diamond star.   My lad wasn't sure if the information was correct so we did a bit of research on it and found out that yes it was!   The lad was suitably impressed.
Picture
I wanted to show you the difference between the coloured pages and the black and white.  I admit the coloured looks good, but the black and white keeps it simple and plain and is MUCH preferred by my lad.
Picture
I have to tell you how much Gramma and My son LOVE playing this game together.  My son visits gramma every week and normally they play chess, go for a walk, finish schooling and just enjoy spending time together.   Chess has currently been replaced with Sunya.   Gramma WILL NOT let me take a picture of the two of them playing, so here's one from when the lad and I were playing.
Picture
Once we got started playing I found it a very intuitive game to play, you can make it easier or harder depending on which cards you put into play.  You can make the zeros so you can only put them in the product but not as a multiplier, and other changes.  These changes are mentioned in the book rules, but honestly.. just play the game.  As my son likes to say "this is way more fun than doing problems to do my math facts"!

Sunya is game, published by Sunya Publishing, that we will continue to enjoy in this household. It's such a good way to practice math facts and to have fun with each other.   One of the things I thought as we played this game was how very easy it would be turn this into a additon/subtraction game as well.. I would just need to mock up the cards for it.  My lad thought that a marvellous idea, because then you could play it with anybody and that would be great!

It was VERY helpful to have the dots on the cards, this made it very easy to tell the 6 and 9's apart, and is just another way to engage the brain in learning.
Picture
Potentially daunting rules or not, it's a math game and I'm glad we just jumped in with both feet and got wet.   We've had so much fun playing Sunya in our household, I think that you will too. Jump in, fine tune it as you go and just have fun.  Check out what other reviewers had to say too.
Picture
Picture
<<Previous
Forward>>

    Who Am I?


    Loved by God and family - these things center me

    Writer, Poet, Hiker, Reader - these things make me smile

    Educating, Raising a child, Involved with Critters, Pastor's wife - These things make me grow

    Picture
    Team Member

    Subscribe to our mailing list

    * indicates required
    Blog Roll

    Enter your email address:

    Delivered by FeedBurner

    Subscribe to A Net In Time Schooling - A Net In Time Blog by Email
    My Joy-Filled Life
    Click here to sign up for SchoolhouseTeachers.com
    Visit Annette's profile on Pinterest.
    Picture

    RSS Feed

    Archives

    September 2017
    July 2017
    May 2017
    April 2017
    February 2017
    December 2016
    November 2016
    October 2016
    September 2016
    August 2016
    July 2016
    June 2016
    May 2016
    April 2016
    March 2016
    February 2016
    January 2016
    December 2015
    November 2015
    October 2015
    September 2015
    August 2015
    July 2015
    June 2015
    May 2015
    April 2015
    March 2015
    February 2015
    January 2015
    December 2014
    November 2014
    October 2014
    September 2014
    August 2014
    July 2014
    June 2014
    May 2014
    April 2014
    March 2014
    February 2014
    January 2014
    December 2013
    November 2013
    October 2013
    September 2013
    August 2013
    July 2013
    June 2013
    May 2013
    April 2013
    March 2013
    February 2013
    January 2013
    December 2012
    November 2012
    October 2012
    September 2012
    August 2012
    July 2012
    June 2012

    Team Member

    Subscribe to A Net In Time Schooling - A Net In Time Blog

    Picture

    Categories

    All
    Adventus
    Affiliate
    A Journey Through Learning
    Animals
    Ants
    Art
    Art Books
    Atutorsoft Math
    Bible
    Biography
    Birdcage Press
    Blast From The Past
    Blog Hop Or Cruise
    Blog Hop Or Cruise
    Blog The Alphabet
    Blog The Alphabet
    Book Club
    Book Review
    Book Review
    Books For Children
    Books Read Lately
    Book Work Day
    Brainfood Learning
    Canada
    Carnival
    Chess House
    Child Led Learning
    Child Led Learning
    Christianity
    Christianity Cove
    Christmas
    Circle Time
    Cleaning
    Coding For Children
    Community Service
    Computer Work
    Contest
    Conversation Jar
    Cooking Class
    Crickets
    Critical Thinking
    Curriculum
    Day In The Life
    Days Of November
    Devotion
    Devotional Time
    Doctrine
    Earth Science
    Educents
    Email
    Encouragement
    Esl
    Essentials In Writing
    Europe
    Experiment
    Faith Issues
    Family
    Field Trip
    Five Day Blog Hop
    Five Minute Friday
    Five Minute Friday
    Five On The Fifth
    Flyby Promotions
    FoodBank
    Foreign Languages
    For Sale
    Freebies
    French Essentials
    Games
    Gardening
    General Update
    Geography
    Giveaway
    Global Art
    Guest Post
    Hands Of A Child
    Hands On Learning
    Handwriting Without Tears
    Healthy Living
    History
    Holidays
    Homemaking Skills
    Homeschooling
    Homeschooling A Singleton
    Homeschooling Essentials
    Homeschooling Helps
    Homeschool In The Woods
    Homeschool Issues
    Hope
    Human Body
    Hymn
    Insects
    International Student
    Issues In Homeschooling
    I Won It
    Joyce Herzog
    Kick
    K'Nex
    Knights And Castles
    Language Arts
    Language Arts
    Language Study
    Legal Issues
    Lego
    Letters To Pastors Wives
    Mammoth Math
    Math
    Middle School
    Miscellaneous
    Missionaries
    Missions
    Movie
    Museum
    Music
    Nature Study
    Nature-study
    On Line Learning
    Online Learning
    Ontario Science Centre
    Organization
    Outer Space
    Parenting
    People Of Faith
    Philosophy
    Phys Ed
    Pinterest
    Play Dates
    Poetry
    Preschoolers And Peace
    Printable
    Random Five
    Reading
    Reading Kingdom
    Recipe
    Resource
    Review
    Sale
    School Planning
    Science
    Scienceandmathcom
    Series
    Sight Words
    Sponsored Post
    STEM Activities
    Student
    Study Aid
    Sunday School For All Ages
    Supercharged Science
    Taking Time To Think
    Target The Question
    Thinking Out Loud
    Thinking Tuesday
    Time4learning
    Tools
    Tos Review
    Ultimate Bundles
    Vacation
    Vendor Sales
    Website News
    Week In Review
    Westminister Shorter Catechism
    Whats-in-my-browser
    Word Blog Hop
    Wordless Wednesday
    Word Prompt
    Youtube

    RSS Feed

     photo 9c2d3d39-9e5d-4351-b060-d6251ee13eaa_zpseda17cd5.jpg
    Follow on Bloglovin Follow my blog with Bloglovin

    2013 TOS Reviews

    IXL.com
    if you were me
    Chess House
    YWAM
    Seed Sowers
    Time4Learning
    Family Hope Center
    Reading Kingdom
    Bible Study Guide for all ages
    Bird Cage Press
    Christianity Cove
    Math Mammoth
    Joyce Herzog
    Homeschool in the woods
    SuperCharged Science
    Adventus
    LoneStar Learning
    A+tutorsoft Math
    Wet, Dry, Try App
    Schoolhouse Teachers
    French Essentials
    Dogwood Mudhole

    Circle Time
    Gryphon House
    Essentials in Writing
    In the Hands of a Child
    A journey through learning
    Ed Douglas
    Picaboo Yearbooks
    VocabularySpellingCity

    2014 TOS Reviews
    Science4Us.com

    Egglo Entertainment.
    ScienceandMath.com
    Supercharged Science.
    Philippians in 28 weeks.
    CTC math
    The Brinkman Adventures.

    Maestro Classics.
    Logic of English.
    Learning Breakthrough
    Go Science DVD's
    Veritas Press
    Happy Kids Songs
    Wizzy Gizmo: In his image
    UberSmart Software.
    Essential Skills Advantage:

    Other Reviews

    My Beloved ..
    Homemaker's Mentor
    Don't Miss the Boat
    Tokens of Promise
    Biff and Becka's ....
    A Child's Geography
    Homeless at Harvard
    30 Days of Bible Study...
    Topaz and the Evil Wizard
    Alone yet not alone
    Lead me Home
    I am Second
    Can't wait Willow
    Hey God....
    This is Our Time
    What I wish I knew at 18
    Classical Composers
    Seeking Christmas.
    Raising boys by design.
    The Ruby Ring.
    Knowing God By name.
    The Jesus Bible, NIV. 
    One Realm Beyond.
Powered by Create your own unique website with customizable templates.